How to Use the Plugin
Enable the connection between Prevu3D and Omniverse
Section titled “Enable the connection between Prevu3D and Omniverse”From the top bar, go to RealityConnect -> Server Settings and Start the connection.
To disconnect, you can redo the same action
Features
Section titled “Features”RealityConnect for Omniverse Functions
Section titled “RealityConnect for Omniverse Functions”Query Prevu3D
Section titled “Query Prevu3D”Once the server is connected, clicking on Query Prevu3d fetches the list of importable objects in RealityPlan.
- Your project must be saved and the connection needs to be established in order to use the Query feature.

Import Selection
Section titled “Import Selection”Once the list of importable object is available. You can select the objects you want to import:
Import settings : either import to space or save to Nucleus :
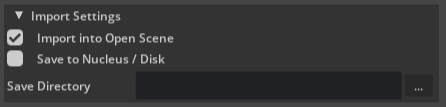 Import the full scene
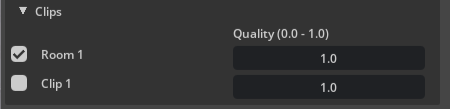
 Import clips :
 Import RealityAsset defined from RealityPlan :

Each file can be imported to the desired level of quality, which is determined by a 0 to 1 scale.
The full scene, clips and RealityAssets can be imported together. Click on Import Selection to load the files to Omniverse.
The load status will take the form of a yellow bar when ongoing and a green one when done :


Show/Hide Full Scene
Section titled “Show/Hide Full Scene”Allow you to change the visibility state of the synched scans. It is quite useful to hide the synched scan if you did clip a specific area at a better resolution. It can be good to show it back if you want to clip another area.