Clean Layer Tool
The Clean Layer tool lets you remove unwanted parts of a blending layer by defining exclusion volumes. Unlike the Clip Layer tool, which controls what to keep, the Clean Layer tool defines what to hide — without affecting underlying layers.
How It Works
Section titled “How It Works”-
A clean volume removes any data inside the defined region.
-
The removed region will appear empty, rather than falling back to a lower layer.
-
The Clean Layer tool is best suited for removing noise and unwanted objects from scans rather than controlling visibility order between layers.
Example Scenario
Section titled “Example Scenario”Here’s a visual walkthrough:
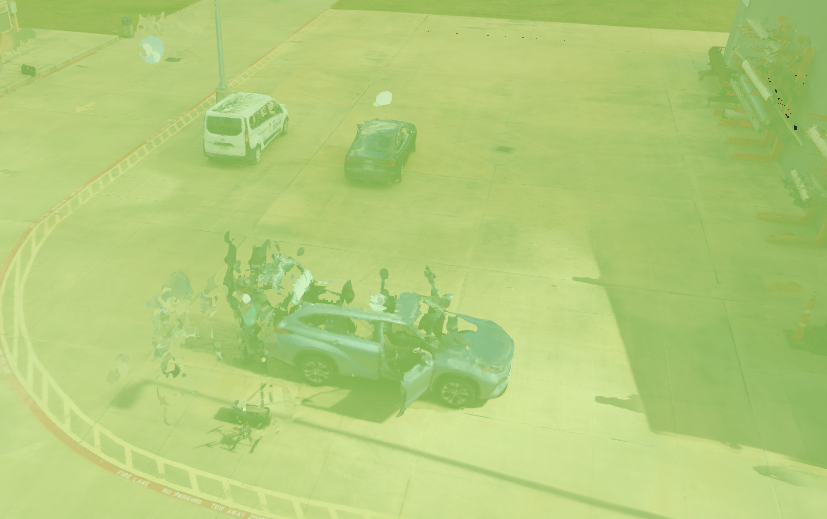
Initial state
We added a layer that captured not only the facility but also some parked cars in the scan. These cars appear inside the dataset even though they are not relevant to the Twin.
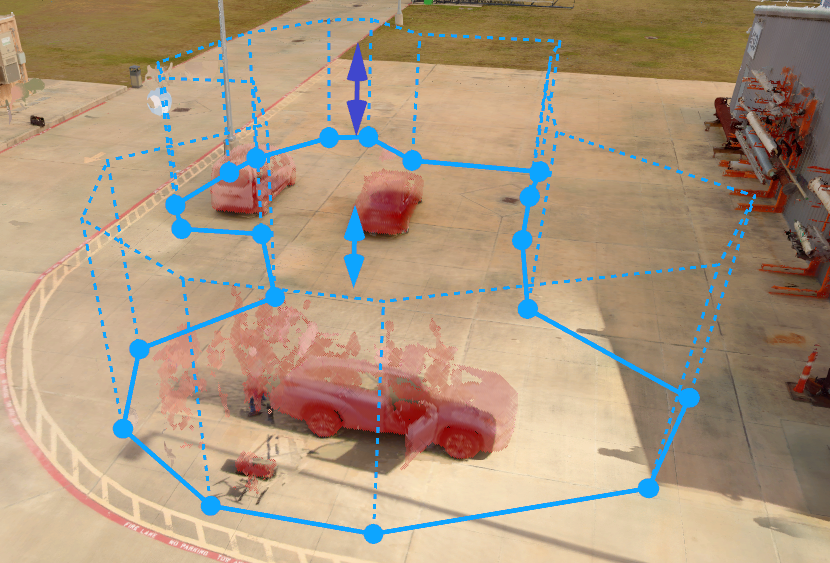
Defining the clean volume
We select the layer and draw a clean volume around the cars. This tells the system: “For this layer, remove everything inside this defined region.”
Result after cleaning
The clean volume removes the cars from the SLAM dataset. Unlike a clip volume, the cleaned area does not reveal underlying layers — it simply clears out the unwanted objects, leaving an empty space.

Typical Use Cases
Section titled “Typical Use Cases”-
Cleaning noise: Remove stray points or overscan areas that leak outside the intended capture zone.
-
Removing undesired objects: Exclude equipment, scaffolding, or temporary structures that were unintentionally captured.
-
Improving clarity: Hide cluttered or overlapping regions to keep the Twin focused on relevant data.
Clip Layer vs. Clean Layer
Section titled “Clip Layer vs. Clean Layer”-
Clip Layer — Shows only what’s inside the defined region. Affects visibility across layers and prioritization.
-
Clean Layer — Hides only what’s inside the defined region. Does not impact underlying layers.
How to Use the Clean Layer Tool
Section titled “How to Use the Clean Layer Tool”Adding a Clean Volume
Section titled “Adding a Clean Volume”-
Select the layer where you want to add a clean volume.
- This can be done either by selecting the layer directly in the 3D scene or from the left-side panel.
-
From the top-center toolbar, select the Clean Layer tool.
-
Choose the volume type:
-
Box — Create a rectangular volume.
-
Polygon — Define a custom shape for more precise control.
-
-
Draw the volume directly in your Twin environment.
Editing Clean Volumes
Section titled “Editing Clean Volumes”-
Select the layer that contains the clean volume you want to edit.
-
You can select an existing volume either directly in the 3D scene or from the right-side panel.
-
From there, you can:
-
Move or resize the volume.
-
Delete a volume if it is no longer needed.
-